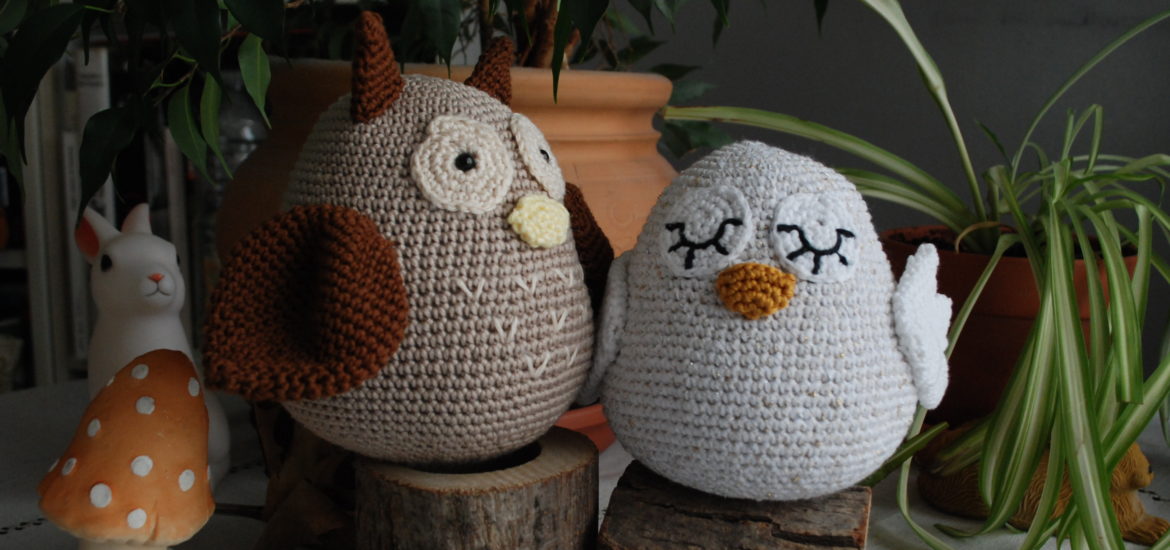
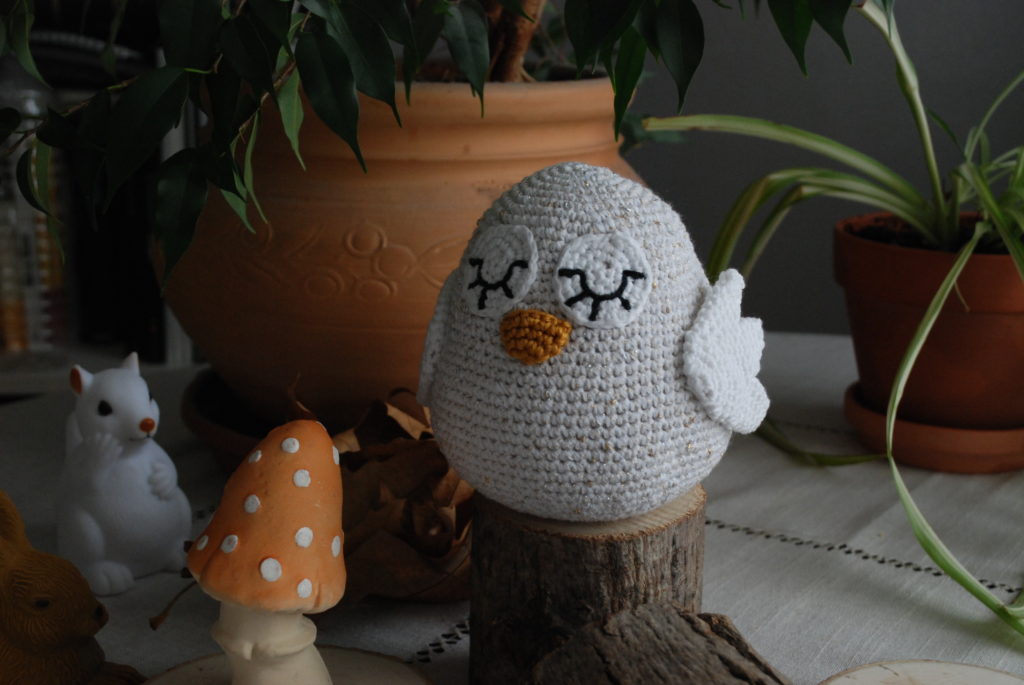
For my new free crochet pattern, I have decided to share with you an owl amigurumi.
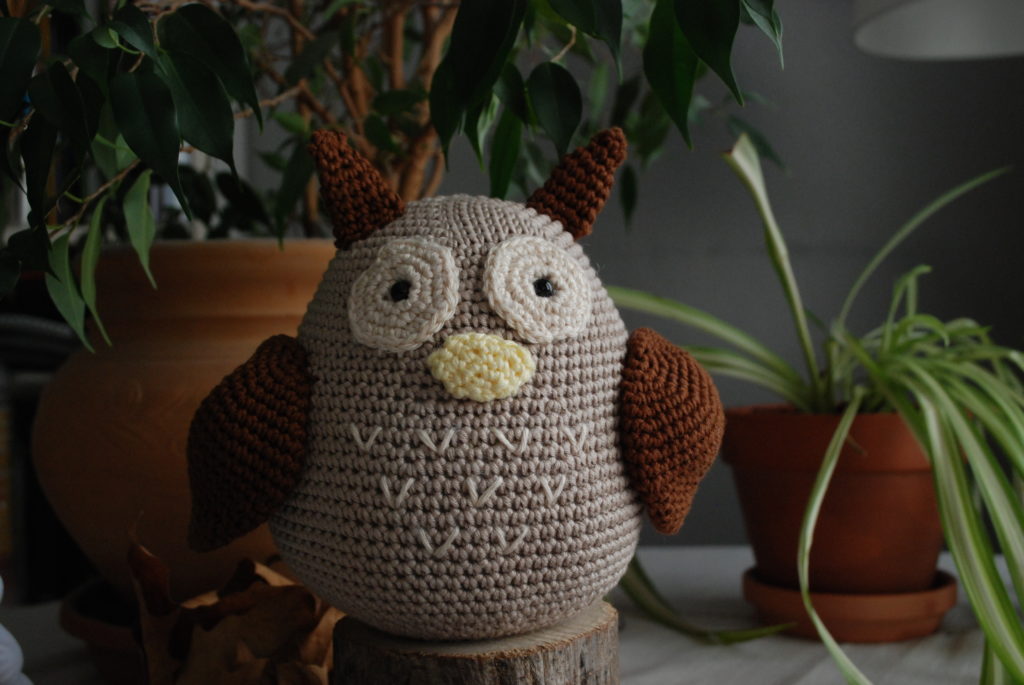
So that you can craft a unique piece, you’ll find that various steps of this pattern will offer you design options [i.e.: wings, eyes, ears].
Be creative and crochet away !!
Just before you grab your crochet hook…
Materials
- 100 % cotton yarn :
- Any color will work just fine, be bold !
- N.B.: Should you decide to realize your owl in a single color, one ball of yarn is quite enough.
- Crochet hook : 3 mm / C
- Stitch marker
- Tapestry needle
- Embroidery scissors (any tiny scissors will do just fine)
- Black safety eyes – 4 mm (optional : you can easily embroider the eyes instead)
- Stuffing
Abbreviations used in the pattern
- st : stitch
- s.c : single crochet
- inc : increase
- dec : decrease
Pattern reading and notes
- [xx] : the number between the square brackets instructs of the total of stitches you should have at the end of the row/round.
- (xxx)*2 : the instructions between brackets should be repeated across the round a certain number of times (in this instance : twice).
Eyes
Make 2, in off-white yarn.
- Rd 1 : start 6 sc in a magic ring [6]
- Rd 2 : inc in all 6 [12]
- Rd 3 : (1 sc, 1 inc)*6 [18]
- Rd 4 : (2 sc, 1 inc)*6 [24]
Fasten off, leaving a long tail for sewing.
Beak of the amigurumi
- Rd 1 : start 5 sc in a magic ring [5]
- Rd 2 : inc in all sts [10]
- Rd 3 : sc in all sts [10]
- Rd 4 : (1 sc, 1 inc)*5 [15]
The beak doesn’t need to be stuffed. Flatten it before the assembly step.
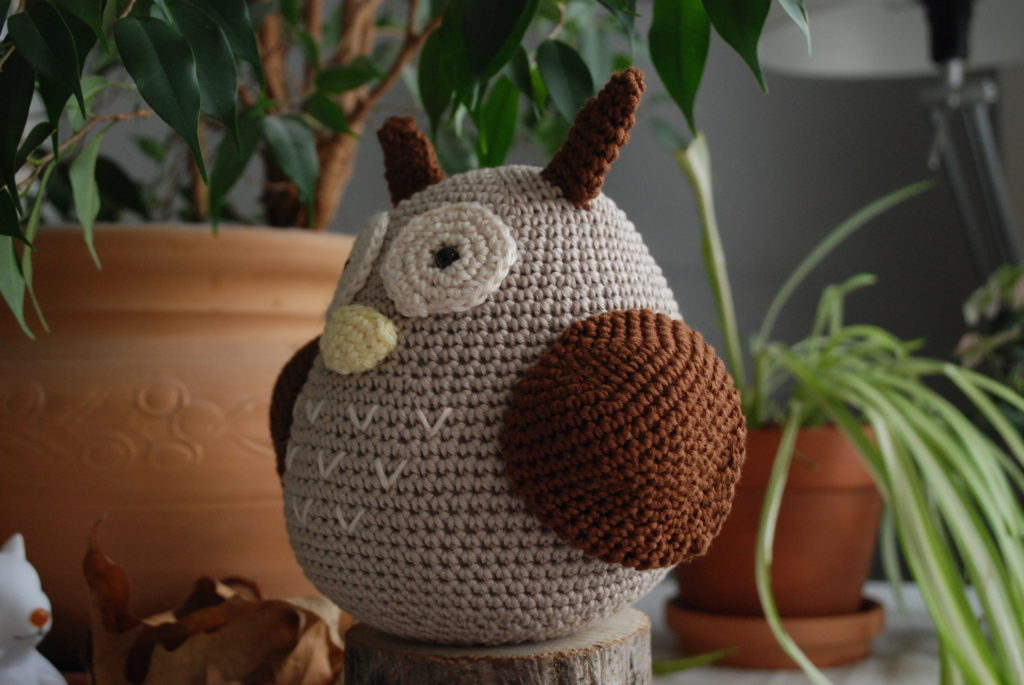
Wings 1st option : raindrops
Your first option for the wings : the raindrop-shape. Make 2.
- Rd 1 : start 6 sc in a magic ring [6]
- Rd 2 : inc in all 6 [12]
- Rd 3 : (1 sc, 1 inc)*6 [18]
- Rd 4 : (2 sc, 1 inc)*6 [24]
- Rd 5 : (3 sc, 1 inc)*6 [30]
- Rd 6 : (4 sc, 1 inc)*6 [36]
- Rd 7 : (5 sc, 1 inc)*6 [42]
- Rd 8 – 10 : sc in all sts [42]
- Rd 11 : (5 sc, 1 dc)*6 [36]
- Rd 12 : sc in all sts [36]
- Rd 13 : (4 sc, 1 dc)*6 [30]
- Rd 14 : sc in all sts [30]
- Rd 15 : (3 sc, 1 dc)*6 [24]
- Rd 16 : sc in all sts [24]
- Rd 17 : (2 sc, 1 dc)*6 [18]
- Rd 18 : sc in all sts [18]
- Rd 19 : (1 sc, 1 dc)*6 [12]
- Rd 20 : sc in all sts [12]
- Rd 21 : dc in all sts [6]
Fasten off, leaving a long tail. With a tapestry needle, weave the yarn tail through the front loop of each remaining stitch and tightly pull to close the wing.
Keep a yarn tail long enough to sew the wings to the body afterwards.
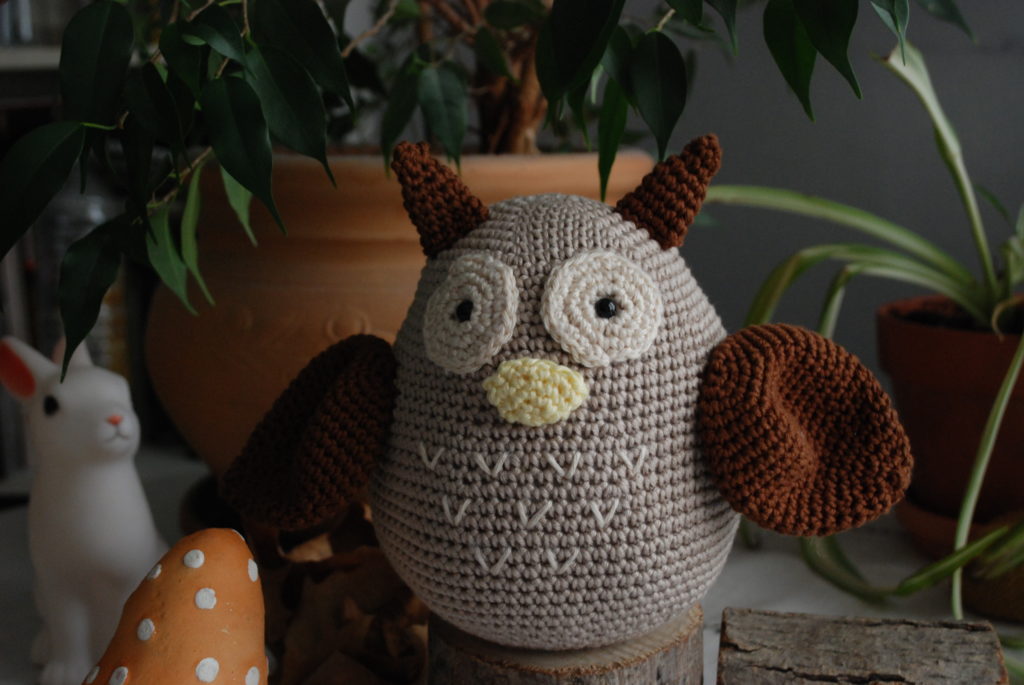
2nd option : fluffy wings
Your 2nd option for the wings : the fluffy type. Make 2.
- Rd 1 : start 6 sc in a magic ring [6]
- Rd 2 : inc in all 6 sc [12]
- Rd 3 : sc in all sts [12]
- Rd 4 : (1 sc, 1 inc)*6 [18]
- Rd 5 – 6 : sc in all sts [18]
- Rd 7 : (2 sc, 1 inc)*6 [24]
- Rd 8 – 9 : sc in all sts [24]
- Rd 10 : (3 sc, 1 inc)*6 [30]
You then have to divide the wing to make 3 feathers (10 stitches for each feather).

1 st feather
Make 5 s.c then join the 25th st of the previous round with 1 s.c. Then :
- Rds 1 – 3 : 1 s.c in all sts [10]
- Rd 4 : (1 dc)*5 [5]
Fasten off, leaving a long tail. With a tapestry needle, weave the yarn tail through the front loop of each remaining stitch and tightly pull to close the feather.
2nd feather
Join yarn in the 1st stitch to the left of the 1st feather then make 5 s.c Rejoin the 5th st. to the right of the 1st feather with a slip stitch. Then :
- Rds 1 – 3 : 1 s.c in all sts [10]
- Rd 4 : (1 dc)*5 [5]
Fasten off, leaving a long tail. With a tapestry needle, weave the yarn tail through the front loop of each remaining stitch and tightly pull to close the feather.
3rd feather
Join yarn to the 1st stitch to the left of the 2nd feather. Make 5 s.c then a slip stitch to join the other side of this last feather. Then :
- Rds 1 – 3 : 1 s.c in all sts [10]
- Rd 4 : (1 dc)*5 [5]
Fasten off, leaving a long tail. With a tapestry needle, weave the yarn tail through the front loop of each remaining stitch and tightly pull to close the feather.
Keep a yarn tail long enough to sew the wings to the body afterwards.
Free owl crochet pattern : ears
Make 2.
- Rd 1 : start 5 sc in a magic ring [5]
- Rd 2 – 3 : sc in all sts [5]
- Rd 4 : inc in all sts [10]
- Rd 5 – 7 : sc in all sts [10]
The ears do not need to be stuffed and must be flatten before sewing.
Crocheted owl’s body
Here is finally the main piece of the amigurumi : the owl’s body.
- Rd 1 : start 6 sc in a magic ring [6]
- Rd 2 : inc in all 6 [12]
- Rd 3 : (1 sc, 1 inc)*6 [18]
- Rd 4 : (2 sc, 1 inc)*6 [24]
- Rd 5 : (3 sc, 1 inc)*6 [30]
- Rd 6 : (4 sc, 1 inc)*6 [36]
- Rd 7 : (5 sc, 1 inc)*6 [42]
- Rd 8 : (6 sc, 1 inc)*6 [48]
- Rd 9 : (7 sc, 1 inc)*6 [54]
- Rd 10 – 14: sc in all sts [54]
- Rd 15 : (5 sc, 1 inc)*9 [63]
- Rd 16 – 20 : sc in all sts [63]
- Rd 21 : (6 sc, 1 inc)*9 [72]
- Rd 22 – 24 : sc in all sts [72]
- Rd 25 : (7 sc, 1 inc)*9 [81]
- Rd 26 – 30 : : sc in all sts [81]
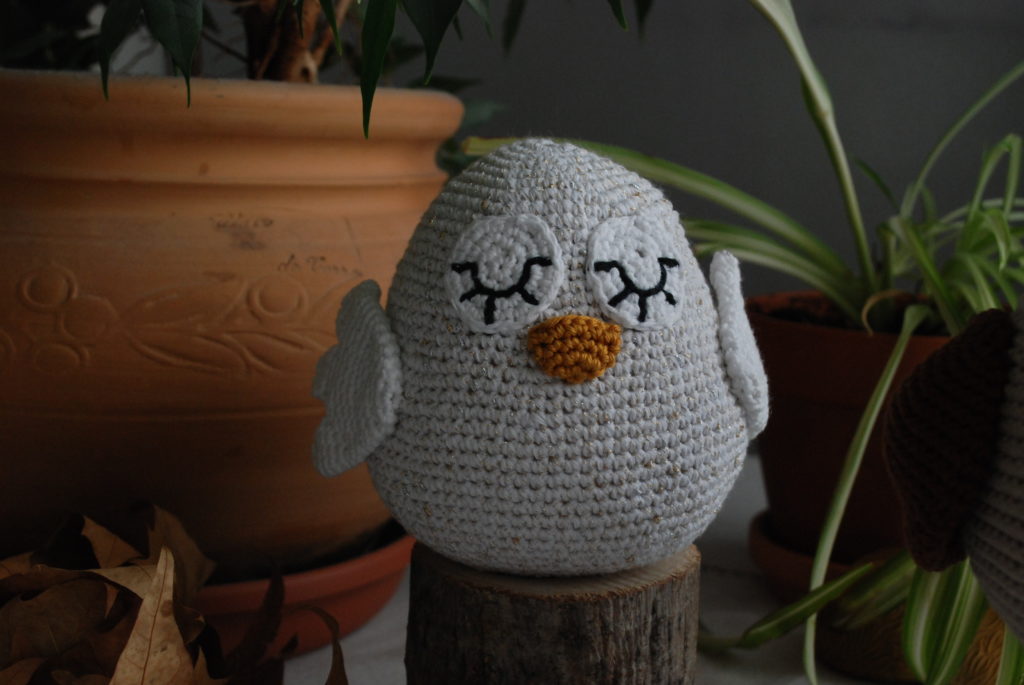
After round 30, sew the crocheted eyes : between rounds 9 and 18, leaving 2 stitches between them. If you have chosen to put safety eyes : insert them both through the crocheted eyes and the owl’s body.
If you want to embroider the eyes, here is also the time !
Then, sew the beak centered just below the eyes.
- Rd 31 – 35 : sc in all sts [81]
- Rd 36 : (1 sc, 1 dc)*27 [54]
- Rd 37 – 38 : sc in all sts [54]
- Rd 39 : (1 sc, 1 dc)*18 [36]
- Rd 40 – 41 : sc in all sts [36]
Just after round 41, you can start to stuff firmly the body. Adjust the stuffing along the way til the end.
- Rd 42 : dc in all sts [18]
- Rd 43 : sc in all sts [18]
- Rd 44 : (1 sc, 1 dc)*6 [12]
- Rd 45 : dc in all sts [6]
Fasten off, leaving a long tail. With a tapestry needle, weave the yarn tail through the front loop of each remaining stitch and tightly pull to close the owl’s body. Weave in the yarn end.
Assembly of your crochet owl
To complete your owl you still have to sew the wings and, if you want, the ears :
- Sew the wings on each side of the body, only on a few stitches, so that they can be movable : place them approximatively 1 round below the beak, 11 or 12 stitches away.
- Sew the ears between rounds 4 and 8.
If you want, you can also embroider a few hairs on the owl’s belly. For the grey one for instance, I embroided 3 lines of hairs V-shaped : a line of 4, a line of 3 and a line of 2 (leaving 2 stitches between each V and a round between each line).
Congratulations, you’re done !
I’ve got to say that my number 1 fan – a.k.a. my beloved son – told me thinking that my kickass owl looks like an accidented potatoe… (thanks a lot for your support ahah !). When I casually brought up that, you know, tubers are hardly caught on sporting glitter, he went : “ well, then I guess it’s a weird sparkling potatoe !”
So… here I hope that my flapping tuber will find grace in your eyes. Don’t hesitate to share your awesome creations with me on Instagram (notifying me : @lafabriquedessonges), to share where you got this pattern from, and mostly, to give me some feedback if something is not crystal clear or if you notice a mistake in the pattern.
Thank you so much and have fun !
Btw : if you want to give a try to my first free pattern, go see my little crocheted onigiri.

Incrivelmente linda!
Muito obrigado 😀
My friend loves owls, these are perfect for her. Thank you for sharing your pattern with me.
You’re so very welcome ! I’m glad you’ll be able to make your friend happy thanks to one of my designs 🙂
very nice
Thank you very much 🙂