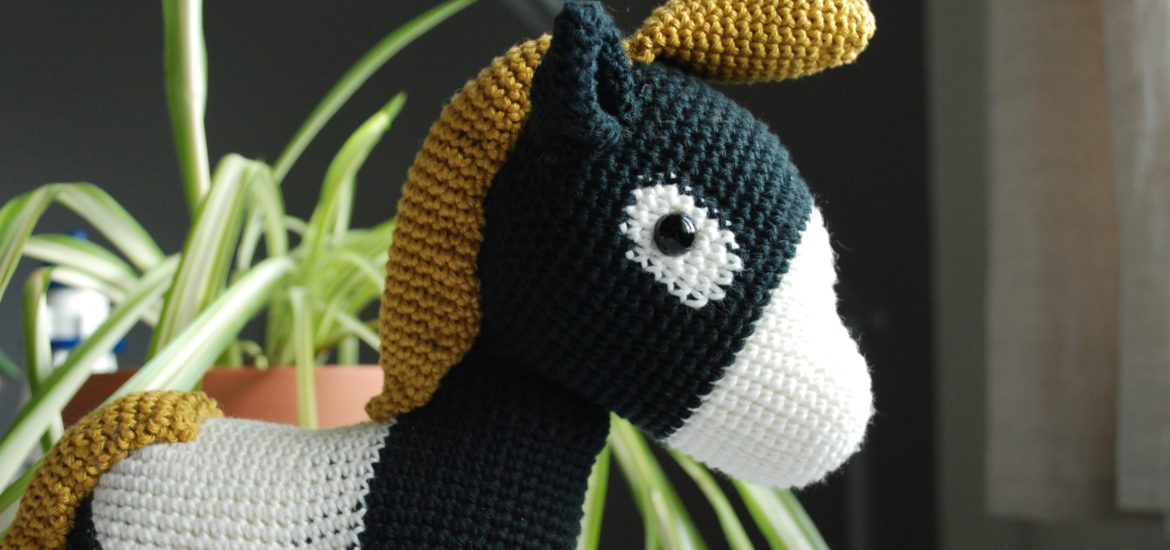
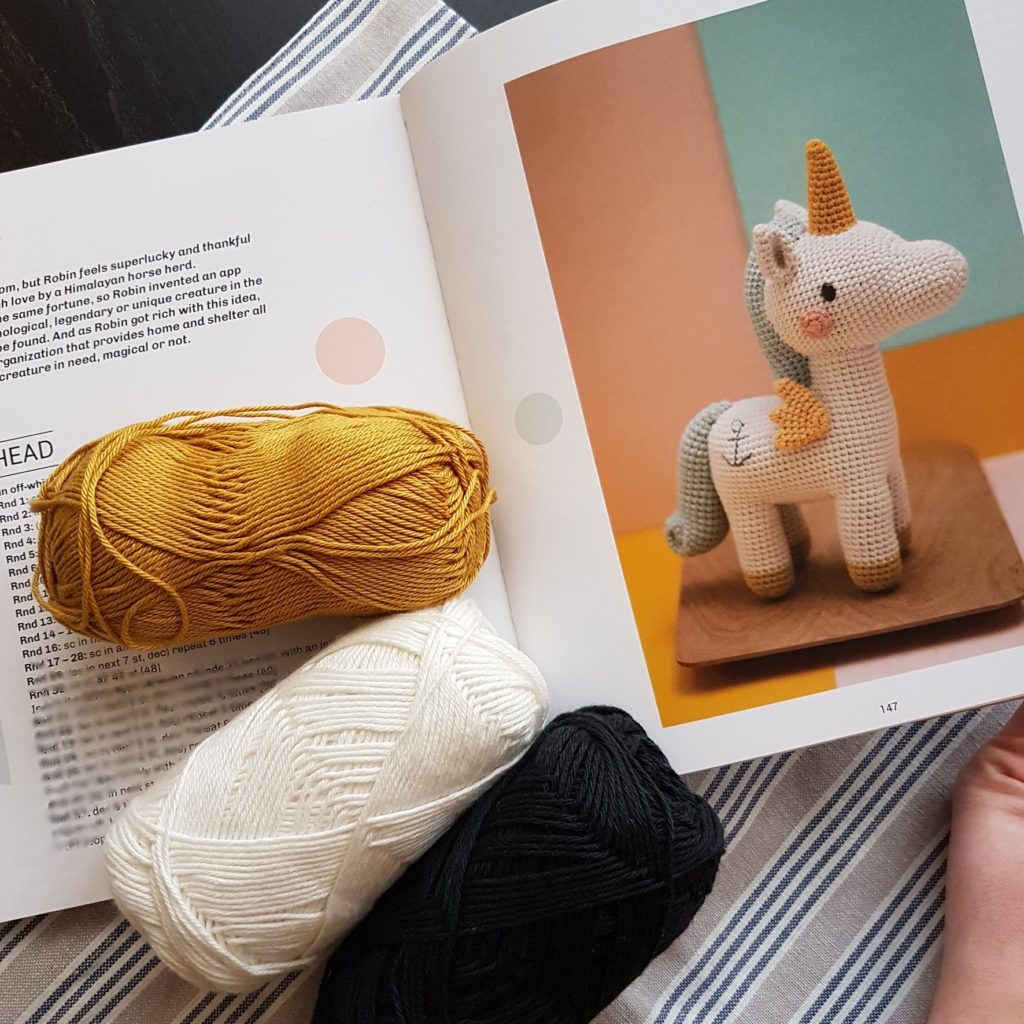
Not that long ago I shared with you my version of Pica Pau’s puffin. I’ve repeated this exercise with another one of her patterns : her unicorn.
When I was a child, I used to love Yakari, a little Native American who can speak with animals and whose best friend is a pony : Little Thunder. When I shared this character with my son, he immediately became a huge fan !

(©Derib + Job ÉDITIONS DU LOMBARD (Dargaud-Lombard sa) 2017)
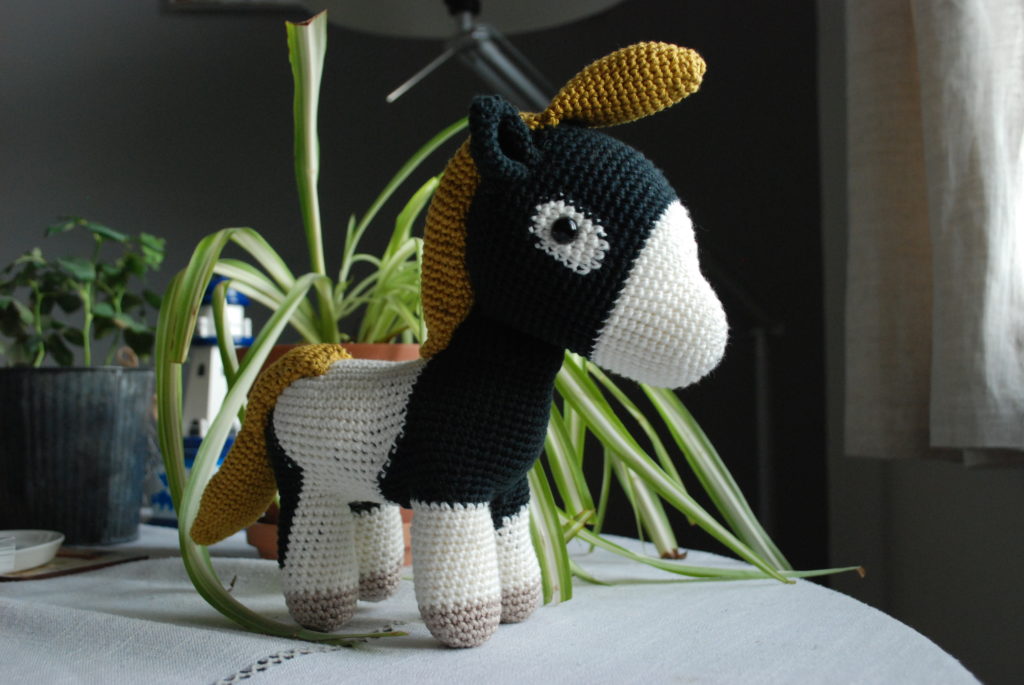
You’re seeing it coming right ? … I’ve changed Pica Pau’s unicorn in Little Thunder.
All infos down below.
Just before you grab your crochet hook…
- For my version of this pattern, you can forego the horn, wings and the badass tattoo adorning the horse’s croup.
- Colors you’ll be needing : black, white, light grey and ochre.
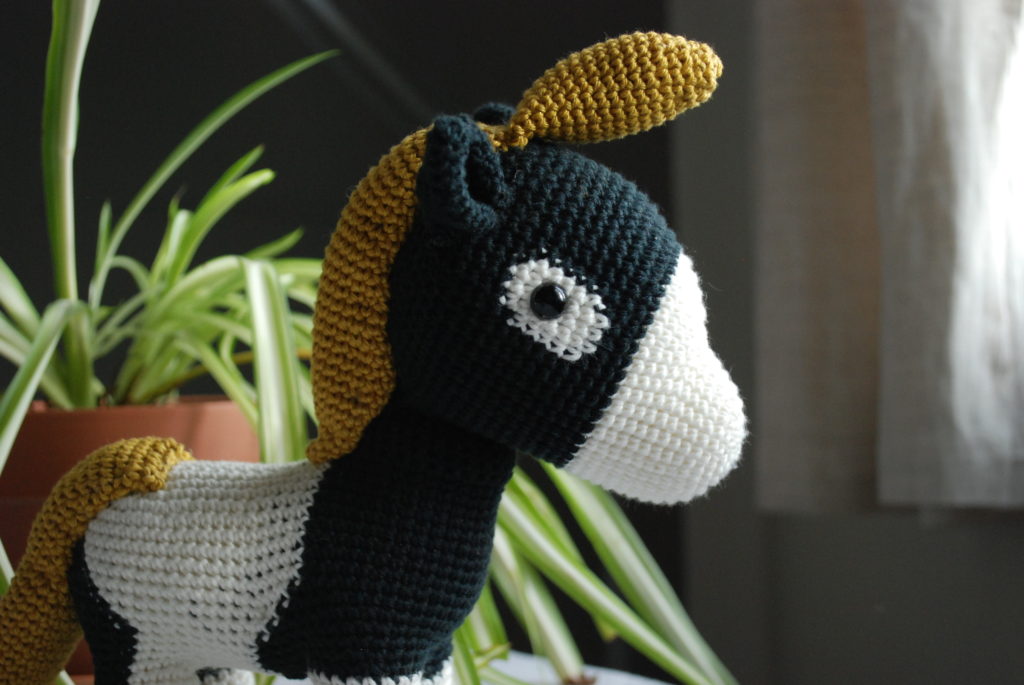
Little Thunder’s head
Here are the steps to crochet Little Thunder’s head :
- First 14 rounds in white.
- Round 15 : change for black.
- Rounds 16 – 17 : keep crocheting in black. From round 18, we’ll be adding white stitches to form the eyes.
- Round 18 : 14 stitches in black, 3 stitches in white, 23 stitches in black, 3 stitches in white, 11 stitches in white.
- Rounds 19 – 23 : 13 stitches in black, 5 stitches in white, 21 stitches in black, 5 stitches in white, 10 stitches in black.
- Round 24 : same as round 18.
- The rest of the head is crocheted in black.
Good to know : i used safety eyes a bit tinier than those advised in the original pattern (9 mm).
Ears of the amigurumi
The ears are all black.
A single change : I’ve actually ended up crocheting 2 extra rounds (11 rounds in total). Those 2 rounds are the same as the last ones detailed in Pica Pau’s pattern.
Yakari’s horse body
Here are the infos to crochet Little Thunder’s body :
- Rounds 1 – 4 : all black.
- Round 5 : the 13 stitches of the foundation chain are done in white. After those, the remaining stitches of the foundation chain are also realized in white (both sides), while the rest of the work will be crocheted in black (namely, the 27 stitches making up the neck).
- Rounds 6 – 7 : black on black and white on white.
- Round 11 : Repeat, although the 5 last stitches should be done in black (instead of white).
- Round 12 : Repeat rounds 6-7’s pattern, however : first 4 stitches in black, last 6 stitches in black too.
- Round 13 : Repeat rounds 6-7’s pattern, however : first 5 stitches in black, last 7 stitches in black too.
- Round 14 : Repeat rounds 6-7’s pattern, however : first 6 stitches in black, last 8 stitches in black too.
- Round 15 :
- Repeat rounds 6-7’s pattern, however : first 7 stitches in black.
- Wherein each side of the horse’s neck: minus 1 white stitch than on the previous round (those 2 white stitches have to be crocheted in black).
- Last 9 stitches in black.
- Round 16 :
- Repeat rounds 6-7’s pattern, however : first 8 stitches in black.
- Wherein each side of the horse’s neck : minus 1 white stitch than on the previous round (those 2 white stitches have to be crocheted in black)
- Last 10 stitches in black.
- Round 17 :
- Repeat rounds 6-7’s pattern, however : first 9 stitches in black.
- Wherein each side of the horse’s neck : minus 1 white stitch than on the previous round (those 2 white stitches have to be crocheted in black).
- Last 11 stitches in black.
- Round 18 :
- Repeat rounds 6-7’s pattern, however : first 10 stitches are in black.
- Wherein each side of the horse’s neck : minus 1 white stitch than on the previous round (those 2 white stitches have to be crocheted in black).
- Last 12 stitches are in black.
- Rounds 19 – 21 : black on black and white on white.
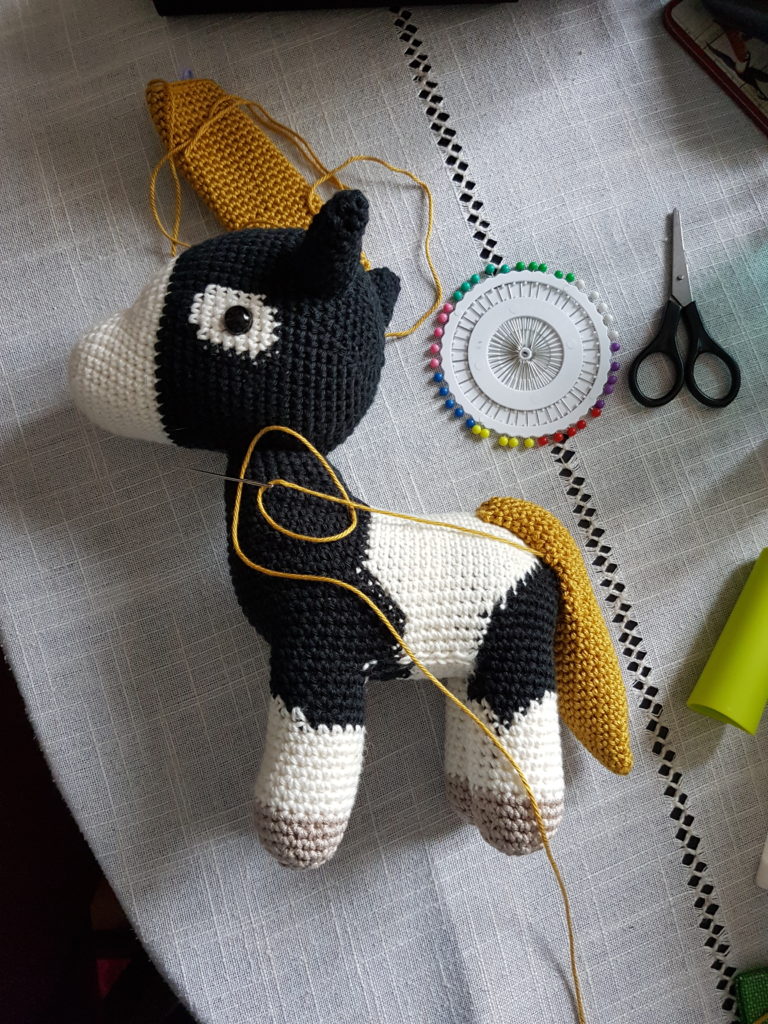
Crocheted horse’s legs
First back leg
Beginning of the first back leg :
- first 2 stitches in black ;
- then black on black and white on white ;
- chain 8 in white ;
- then black on black and white on white.
After that :
- Rounds 1 – 4 : black on black and white on white.
- Rounds 5 – 6 : 3 stitches in white (2 more than in the last rounds), 4 stitches in black, the rest of the stitches in white.
- Rounds 7 – 8 : 5 stitches in white, 2 stitches in black, 13 stitches in white.
- Rounds 9 – 11 : all stitches in white.
- Rounds 12 – 17 : all stitches in grey (hoof).
First front leg
All the stitches are crocheted in white (except for the hoof of course).
Second front leg
Start in black. Then, from round 3 : 3 stitches in black, 3 stitches in white, the rest in black.
After that :
- Round 4 : 1 stitch in black, 7 stitches in white, the rest in black.
- Rounds 5 – 11 : all the stitches are done in white.
Second back leg
Start in black. Then, from round 3 : 5 stitches in black, the rest in white.
After that :
- Round 4 : 1 stitch in white, 3 stitches in black, the rest in white.
- Round 5 : 2 stitches in white, 1 stitch in black, the rest in white.
- Rounds 6 – 11 : all the stitches are in white.
Little Thunder’s belly
- For the main flap : black on black and white on white.
- For the 2 flaps between the legs : all in black.
Tail and mane
Using an ochre yarn, follow the various steps detailed by the original pattern.
Additionnal puff for the mane
I crocheted an additionnal puff to the unicorn’s mane. Here are the infos to make it :
- Round 1 : 5 sc in a magic ring [5].
- Round 2 : inc in all stitches [10].
- Round 3 : 1 sc in all stitches [10].
- Round 4 : (1 sc, 1 inc)*5 [15].
- Round 5 : 1 sc in all stitches [15].
- Round 6 : (2 sc, 1 inc)*5 [20].
- Rounds 7 – 18 : 1 sc in all stitches [20].
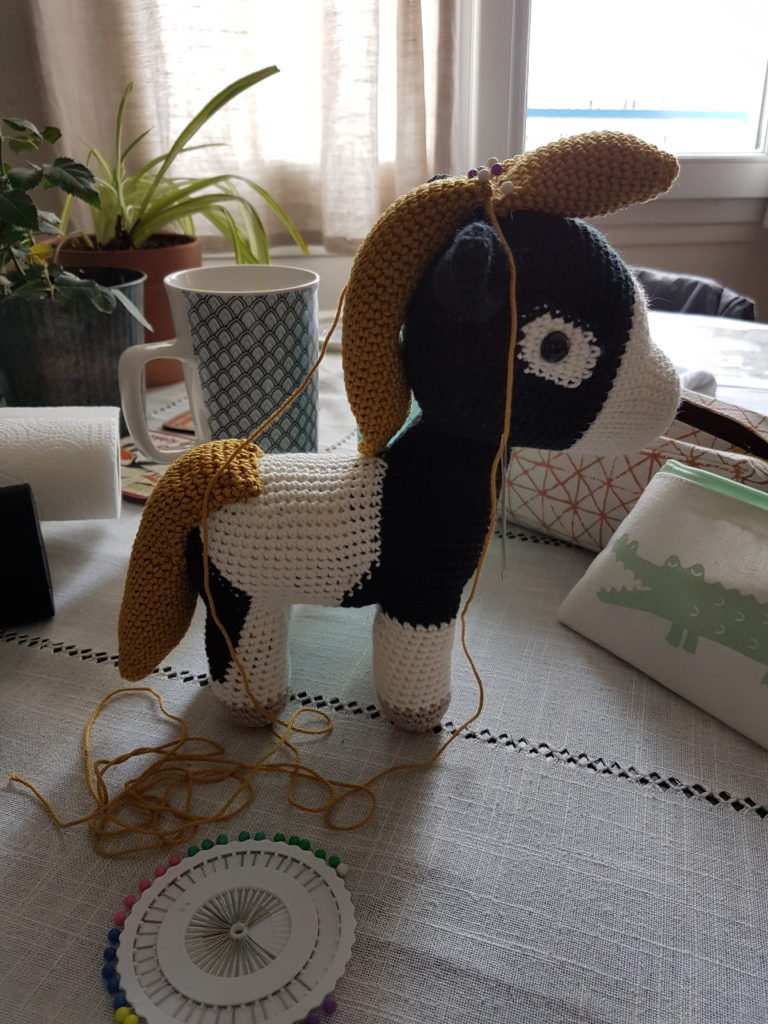
Assembly of the amigurumi : a few tips
- When you’ll get to sewing the tail : no need to twist it at the end.
- As per the mane : start by sewing the main part (from the top of the head, between the ears, to the lower part of the neck). Once it’s fixed, sew the additional puff to both the original mane and the top of the head to secure it.
Congrats, you’re done !
I’d like to remind you guys that my explications can’t be used on their own to complete this particular project. I only provided you with the alterations I’ve made to the Pica Pau’s pattern.
If you’re looking to crochet my take on her design, don’t forget to get to her website and secure her original pattern, which literally makes for the backbone of my horse.
Cheers!
